Coconut Lime Loaf

“Put de lime in de coconut” and treat yourself to a slice of this sweet (yet tangy), dense (yet moist) quick bread. An easy-to-make poured fondant icing crowns the bread with a fudge-like lime topping, a pleasure to bite into. Coconut cream and shredded coconut add unique flavor and texture to this bread.

Don’t expect cake, my friends. The line between cake and quick bread can be a little fuzzy, I know, but this is definitely bread. I had to keep talking myself out of adding beaten egg whites, cake flour, more leavening. If I want lime cake, I’ll make a lime cake! What I was looking for was a bread that would slice nicely for a spring tea luncheon my Homemakers’ Club is having next month, and this is definitely it.

You know by now that I rarely create easy recipes, preferring to fuss with my food. But this is sooooo easy. The hardest thing you will have to do is juice and zest the limes. I finally broke down and bought a little hand juicer (up ’til now I’ve heroically squeezed citrus by hand, wedge by wedge) which made it go much faster, so you may see more lemon and lime recipes from me in the near future.

Tips:

  • Do not overmix. It’s okay to see small streaks of flour in the batter when it’s being spread in the pan. Too much stirring makes a heavier loaf and can create tunnels.
  • If you can’t find coconut cream, substitute coconut milk or regular milk. (Use 1/2 cup plus 2 tablespoons.)
  • Be patient! Don’t cut that loaf until it’s completely cooled. In fact, it slices beautifully if you wrap the cool, iced bread in foil and refrigerate it overnight. Besides, the texture and flavor are always better on the second day.
  • I haven’t tried this (yet) but I’ll bet this bread would be killer with chopped macadamia nuts.
  • I use a grater for lime zest because I like to see the flecks in the bread. A microplane will work well, too, but it won’t be quite as pretty.
Coconut Lime Loaf
Print
Author:
Ingredients
  • BREAD:
  • 2 cups all-purpose flour
  • 1½ teaspoons baking powder
  • ½ teaspoon baking soda
  • ¼ teaspoon salt
  • 4-5 average size limes
  • ½ cup butter, softened
  • ¾ cup white sugar
  • 2 eggs
  • 1 can (5.2 ounces) coconut cream (or use ½ cup plus 2 tablespoons milk)
  • 1 teaspoon vanilla
  • green food coloring (optional)
  • ⅔ cup sweetened, shredded coconut
  • ICING:
  • 1 cup powdered sugar
  • 1 tablespoon corn syrup
  • 1 tablespoon lime juice
  • 2 teaspoons water
  • 2 oz white chocolate (about 22 Wilton candy melts . . . or ⅓ cup)
Instructions
  1. Heat oven to 350 F. Prepare one 9x5" loaf pan by lining with a piece of parchment (let paper come over the sides so you can lift the bread out easily) and spraying with non-stick spray.
  2. Sift the flour, baking powder, baking soda, and salt together twice. Set aside.
  3. With a fine grater, zest the limes, being careful to just grate off the dark green skin, not the white underneath. Juice the limes. You will need ¼ cup of juice for the bread and 1 tablespoon for the icing. If you don't have quite enough juice, add a little water.
  4. In a large bowl, beat the butter and sugar together until light and fluffy. Add the eggs and beat well, scraping the side of the bowl often.
  5. Add the coconut cream, vanilla, and just a tiny amount of green food coloring (if using). Mix until combined.
  6. Add the coconut and dry ingredients. Stir gently just until most of the flour is incorporated. Do not overmix!
  7. Spoon into prepared loaf pan and gently smooth the top. Bake for approximately 50 minutes, or until a toothpick comes out clean when inserted into the center of the bread.
  8. Cool on a wire rack for 10 minutes. Lift loaf out and let it cool completely.
  9. ICING: (This can be poured on warm bread.)
  10. In a small pan heat the powdered sugar, corn syrup, lime juice, and water until hot but not boiling. Remove from heat and stir in the white chocolate. Once melted, stir until it cools and thickens a little, then pour over the bread, allowing icing to drip down the sides of the loaf.
  11. Let icing harden and serve or store. (This bread is even better the next day.)

You’ll only need 1 tablespoon of zest, so don’t try to get every little bit off the limes.

Coconut cream

Spread batter into prepared pan. If your loaf pan is a little smaller than 9×5 you’ll get a more domed top. It may take a few more minutes to bake, too.

Stir white chocolate into hot sugar mixture. I used candy melts so the icing would be bright white.

Isn’t it pretty? It would be a lovely treat for Mother’s Day, too, which is just right around the corner! Enjoy.

Lorinda


Guinness Stout Bread

Hearty and rustic, yet surprisingly light (thanks to the addition of a full bottle of Guinness  Draught Stout), this bread will be the ideal accompaniment for your St. Patrick’s Day feast. Oats and whole wheat flour give the loaves a wonderful texture, molasses adds a slightly sweet back note, and the beer adds a rich, yeasty, complex flavor. I added chopped raisins to one loaf and loved the results, especially when the bread was toasted.

You can use any dark beer you want, of course. I just picked this because it screamed “St. Patrick’s Day” to me, and I was won over by the packaging that promised a hint of chocolate and coffee flavor. Sold!

I had to make a second batch to double-check my measurements. I always lose count when it comes to cups of flour and then I try to convince myself that I’m (pretty) sure it was three cups when it actually might have been four. But that would haunt me, so . . . I give in and make it again.

I hate to burst your bubble if you see me as some meticulous baker, but here is my actual plan of action for this recipe. Seriously, this is the way I work!

Obviously, I need someone to follow around after me, taking notes!

Anyhow, I’m glad I had to make another batch because I was inspired to make the dough balls into shamrocks, and . . . aren’t they nice? I also ran out of wheat flour (only had a cup) so used 1/2 cup of buckwheat flour, which made the dough a little darker and—according to my husband—even tastier. If you have some, you might want to try that!


Guinness Stout Bread
Print
Author:
Ingredients
  • 1 bottle (11.2 fl oz) dark beer (I used Guinness Draught Stout)
  • 4 tablespoons butter
  • ⅓ cup molasses
  • ½ cup very warm water
  • ½ teaspoon sugar
  • 1 package active-rise yeast
  • 1 cup oats (old-fashioned or quick)
  • 1½ cups whole wheat flour
  • 1½ teaspoons salt
  • 2½ - 3 cups white bread flour
  • ½ cup chopped raisins - optional
  • cornmeal - optional
Instructions
  1. In a small pan, combine the beer, butter, and molasses. Cook over low heat until the mixture is lukewarm and the butter is mostly melted.
  2. In a small bowl, combine the warm water, sugar, and yeast. Allow it to get bubbly - about 5 minutes.
  3. In a large bowl (a sturdy stand mixer with a dough hook is recommended) combine the beer mixture, yeast mixture, oats, wheat flour, and salt.
  4. Slowly add 2 cups of bread flour and mix well. Add as much remaining flour is needed until the dough comes cleanly away from the side of the bowl. Continue to knead by machine for 6 minutes (or drop onto a floured surface and knead by hand for 8 minutes), then place in a greased bowl. Cover with a towel or plastic wrap and allow the dough to rise until doubled - about 1 hour.
  5. Move dough to a lightly floured surface and divide into 2 pieces. Form into balls and place on a large baking sheet. If you are adding chopped raisins, knead into the dough before forming the balls. (Optional: sprinkle the baking sheet with cornmeal for a crunchy bottom crust.)
  6. Cover and allow to rise until double - about 1 hour.
  7. Heat oven to 375 F.
  8. Cut a large "X" in the top of each loaf and bake for approximately 30 minutes, or until the bread is a rich brown and the bottom sounds hollow when tapped. Move to a rack to cool. You can brush the top of each loaf with butter if you want them to have a sheen, and to soften the crust slightly.
  9. TO MAKE SHAMROCKS: Once the balls of dough are shaped, cut four 1½ - 2" slices at (picturing a clock) approximately 10:00, 2:00, 4:00, and 8:00. Make sure to leave the center intact. This creates three petals and a stem. Pull firmly down on the stem to stretch it out into the desired shape. Use your fingers to shape the petals and cut a shallow slice down the center of each to add shape. Bake as directed above.

Place dough in a greased bowl, cover, and let rise until doubled.

Divide dough into two pieces. Add chopped raisins if desired. (Totally optional.)

Place on a baking sheet. I like to dust mine with cornmeal for a crunchy bottom crust. (One is plain, one with raisins.) Let ’em rise until doubled, about 1 hour.

After loaves have doubled, cut a large ‘X’ on each and bake.

Baked. Brush the hot loaves with butter if you want them shiny, or prefer a softer crust.

IF YOU WANT TO CREATE SHAMROCKS:

Form the dough into two balls.

Cut 4 slits. (My cuts were a little wonky. Aim for 4:00 and 8:00 on the bottom and then stretch out the stem.)

Mold and shape the petals. Make a cut down the center of each to add shape.

Place on baking sheet and allow to rise until almost doubled, then bake!

FAQs:

Q: Does the house smell amazing while the bread bakes?
A: The house smells like a brewery! A fragrant brewery, but . . . pretty heady.

Q: I don’t like beer. Can I use wine instead?
A: Are you crazy? No! Go home.

Q: Can you give me a gluten-free, vegan, sugar-free version of this recipe?
A: Um. You haven’t been hanging out here very long, have you? I’m a Paula Deen type of baker. This is actually a healthy recipe for me; molasses instead of white sugar, less than a pound of butter, and some oats and wheat flour thrown in to impress you. You’re welcome!

Anyone else? No? Good.

I have a very elaborate recipe in the works. This was easy; the next one will be a lot more challenging. Bwa ha ha. Check back in a few days!

Lorinda

Maple Raisin Challah

What’s rich and brown, shiny and sleek, and smells like Vermont at sugaring time? The answer is Maple Challah, aka “the end of dieting as we know it”. Once this heady fragrance wafts out of your oven, all good intentions will be put aside and you’ll be a gonner!

I used maple syrup to sweeten the dough, but it doesn’t give enough maple “kick”, so I turned to my trusty Mapleine. Maple flavoring, maple extract, it’s all good! And, in case you’re wondering, I found kosher maple flavoring and refined coconut oil on the internet.

Whether you make a simple three-strand braid or go all out for the six-strand braid, this bread won’t fail to impress; it’s gorgeous even if you try desperately to follow instructions and still come up with a wonky braid!  

Ahem.

I tried a six-strand braid. Several times. I had no trouble with four strands (see my Pumpkin Challah ) but apparently, that was pushing the limit of my braiding skills. I hate videos, but this is one time I probably should have watched a tutorial. In the end, I did the best I could, tucked the less than attractive ends under, and hoped that a good, puffy rise and a lot of egg yolk would cover my worst messes. It wouldn’t pass the test of experienced challah bakers, but it worked for me.

Because I can never get enough maple flavor, I sprinkled the top of one of the loaves with maple sugar which gave a slightly burnt-sugar flavor and made the crust a tiny bit crunchy. I loved it, though it takes away the pretty shine. It’s totally optional, of course, but mmmmmm. Here’s what the sugar-topped loaf looks like next to one with a traditional egg yolk wash:

Left loaf was brushed with yolk wash and sprinkled with maple sugar

Remember that challah dough is rich and will take a little longer to rise than a basic sandwich bread. Make it when you’ll be home all day so you don’t try to rush it. Ninety-minute rise times are to be expected. You don’t have to sit and watch it – just set a timer and go about your business, and before you know it you’ll be tearing off a tender piece of maple goodness.

Maple Raisin Challah
Print
Author:
Makes 1 large loaf or 2 small loaves. Simple braids are very attractive. For more complicated braids, look for online tutorials.
Ingredients
  • ½ cup hot water
  • ½ cup raisins
  • ½ cup pure maple syrup
  • ¾ cup warm water
  • pinch sugar
  • 1 package active dry yeast
  • 2 eggs plus 1 yolk, divided (extra yolk is for glazing bread)
  • ⅓ cup refined coconut oil, melted (or you can use a mild-flavored cooking oil)
  • 1 tablespoon maple flavoring - or to taste
  • 5 cups all-purpose flour
  • 2 teaspoons salt
Instructions
  1. Combine hot water and raisins in a small bowl and let sit for 10-15 minutes to plump raisins. Stir in maple syrup.
  2. In a small bowl or cup combine warm water, sugar, and yeast. Allow it to sit until yeast is foamy.
  3. In a large bowl, (a stand mixer with a dough hook is recommended) combine eggs, oil, maple flavor, the raisin mixture, and the yeast mixture.
  4. Add flour and salt. Mix well. Allow mixer to knead dough for 5-6 minutes. (If mixing by hand, drop dough onto lightly floured surface and knead 7-8 minutes.The Dough should be soft and slightly tacky. If it's too sticky, add a little more flour.
  5. Place dough in a greased bowl. Turn to coat the dough, cover with a dish towel, and allow it to rise until doubled - about 90 minutes.
  6. For one large 3-strand braid, divide dough into 3 equal parts. (For 2 small braids, divide into 6 equal parts.) Braid loosely and tuck ends under. Place on parchment covered baking sheet and cover with a damp cloth. Allow bread to rise until doubled, about 90 minutes.
  7. Heat oven to 350 F.
  8. Whisk egg yolk with 1 teaspoon water. Brush generously over entire challah. Bake for approximately 40 minutes, until bread is deep golden brown and sounds hollow when tapped.
  9. Remove from baking sheet and cool on wire rack.

Hot water, raisins, and maple syrup

Combine eggs, oil, maple flavor, raisin mixture . . .

. . . and the foamy yeast

Put dough in greased bowl and let it rise. It will go from THIS . . .

. . . to THIS. Now comes the fun part – braiding!

Braiding a round challah. I’m not EVEN going to try to explain this. The Internet is your friend, with lots of tutorials.

Brush with egg yolk and sprinkle with maple sugar if desired. The more sugar you add, the crunchier the crust will be.

Bake. Cool on a rack if you have superhuman self-control. Otherwise, rip and tear!

I haven’t tried it (yet), but I’ll bet this recipe would be great for rolls, too. I think I’ll add them to my Thanksgiving plan. And I may try mixing maple syrup with that egg yolk before brushing it on the bread. If you beat me to it, let me know how that works!

Lorinda


Pumpkin Challah

What a satisfying nod to “Pumpkin Everything” season this glossy challah bread is! Pumpkin puree enhances the slightly sweet, subtly spiced dough, assuring it a place of honor at any table. Seriously, it will steal the show!

And I have to tell you, Pumpkin Challah makes the ultimate French toast. Drizzle it with maple syrup and dig in.

You know I love to play with my food, right? I thought a 4-rope braid would be difficult to do, but it really wasn’t. There are lots of videos on the Internet, but you probably won’t need one. Here’s a nice tutorial from Baking Bites.

Basically, if you think of your ropes as always being numbered (starting from the left) 1,2,3, and 4, it will go like this:
1 over 3
2 over 3
4 over 2
Repeat until you run out of dough. Just remember: no matter what, #1 is always the rope on the left and #4 is always the rope on the right.

. . . and back to 1 over 3. Keep going until you run out of dough.

Pinch the ends and tuck under. Let rise under a damp cloth until doubled.

I’m going to get all wild and go for the 5 rope version next time. No guts, no glory!

Challah is a fairly rich dough, so it can take a little longer to rise than most recipes. Count on 90 minutes instead of the standard hour for each rise. Be patient; the wait is worth it.

Note: I kept this as simple as possible, but you might want to add raisins to the dough just before you put it in the bowl to rise. And, of course, poppy seeds or sesame seeds on the top before baking is traditional. I just wanted to see it in its shining glory, unadorned.

I cut back on the sugar a little for this recipe because my first try seemed sweet—like those lovely Hawaiian rolls. If that’s what you’re looking for, add an additional 1 tablespoon of sugar. I won’t tell!

Pumpkin Challah
Print
Author:
Makes 1 large or 2 small loaves. Add raisins if you wish, or sprinkle with sesame seeds or poppy seeds before baking.
Ingredients
  • ¾ cup warm water
  • a pinch of sugar
  • 1 package active dry yeast
  • 1 cup solid pack pumpkin
  • 2 eggs plus 1 yolk, divided (extra yolk is for glazing bread)
  • ¼ cup refined (no flavor) coconut oil, melted (or you can use a mild cooking oil)
  • 5 cups all-purpose flour
  • ¼ cup brown sugar, firmly packed
  • 1 tablespoon white sugar
  • 2 teaspoons salt
  • 1 teaspoon pumpkin pie spice
Instructions
  1. In a small bowl, combine the warm water and sugar. Add yeast and let sit until frothy - about 5 minutes.
  2. In a large bowl (a stand mixer with a dough hook is recommended) combine pumpkin, 2 eggs, and melted coconut oil.
  3. Add yeast mixture, flour, brown sugar, white sugar, salt, and pumpkin pie spice. Knead by machine for 5-6 minutes, or by hand on a floured surface for 7-8 minutes.The dough should be soft and slightly tacky. It may leave streaks on the side of the bowl, which is okay. If it's really sticky, add a little more flour.
  4. Place dough in greased bowl, turning once to coat the dough. It should feel pillowy soft. Cover and allow the dough to rise until doubled, 60-90 minutes.
  5. Punch dough down lightly, divide into 4 equal parts, and roll each into a 24-inch rope. (If making 2 smaller loaves, divide into 8 equal parts and roll each into a 14-inch rope.)
  6. Pinch the 4 ropes together at one end, separating each rope slightly. When you're braiding, remember that whichever rope is on the left is always #1, and whichever is on the right is always #4. Braid! (But not too tightly.)
  7. Put #1 over #3
  8. Put #2 over #3
  9. Put #4 over #2
  10. Repeat until finished. Pinch the ends together and tuck under.
  11. Place on parchment covered baking sheet, cover with damp cloth and allow bread to rise until doubled - about 90 minutes.
  12. Heat oven to 350 F.
  13. Whisk egg yolk with 1 teaspoon water. Brush generously over entire challah.
  14. Bake for approximately 40 minutes, until bread is deep golden brown and sounds hollow when tapped.
  15. Cool on a rack.

Add softened yeast to pumpkin mixture.

Mix in the dry ingredients and knead by machine for 5 -6 minutes (or by hand 7-8 minutes)

You’re going for a soft dough, so it’s okay if it doesn’t come cleanly away from the side of the bowl.

Put dough into greased bowl, turn to coat. Form into soft, pillowy ball and let rise until doubled.

Divide dough into 4 pieces (8 if you’re making 2 small loaves). Yes, I’m OCD. Yes, I’m weighing mine. You don’t have to!

Once braid has doubled, brush with egg yolk glaze and bake.

You can also opt for making 2 smaller loaves.

I have another version in mind, so you’ll probably see another challah recipe soon. If you’ve been following my blog, I’ll bet you can guess what flavor it will be. C’mon . . . let’s see those guesses!

Lorinda


Ginger Spice Pumpkin Biscuits

Ginger Spice Pumpkin Biscuits

It’s the first day of October, and (ahem) I’d like to point out that this is the first new pumpkin recipe I’ve posted for the season. You would really admire my restraint if you saw the long list of possible pumpkin creations I’ve accumulated, taunting me daily. These flaky, tender (yet slightly crunchy) biscuits were on the top of that list, and I couldn’t have been happier with the outcome.

The pumpkin flavor and blend of spices add a depth of flavor to the biscuits but aren’t overwhelming. And they are so versatile! Add a sprinkling of cinnamon sugar before baking for a sweet touch or cover biscuits with sausage gravy for a savory flair. They are seriously good either way.

Homemade biscuits are really easy, as long as you remember two things:

  • Keep everything cold
  • Handle the dough as little as possible

By now you probably know that I have a love/hate relationship with shortening. I know it’s not a healthy choice, and try to use alternatives as much as possible, but I’ll say it again: biscuits, pie crust, and peanut butter cookies just aren’t as good without it. I’m willing to make an exception for these goodies. If you aren’t, then, by all means, substitute very cold butter. (But they probably won’t be as light and fluffy.)

I used fresh ginger in this recipe. If you don’t have any and must make these right now, you can substitute 1/2 teaspoon of ground ginger.

Ginger Spice Pumpkin Biscuits
Print
Author:
These easy biscuits are subtly flavored with pumpkin and spices, perfect as a meal accompaniment or snack. Flaky and tender, they are soft inside but slightly crunchy outside. Irresistible! Makes 10 jumbo biscuits.
Ingredients
  • 3 cups all-purpose flour
  • 2 tablespoons brown sugar
  • 4 teaspoons baking powder
  • ½ teaspoon baking soda
  • ½ teaspoon salt
  • 2 teaspoons grated fresh ginger (or you may substitute ½ teaspoon ground ginger)
  • 1 teaspoon ground cinnamon
  • ¼ teaspoon ground nutmeg
  • ⅛ teaspoon ground allspice
  • ⅛ teaspoon ground cloves
  • 1¼ cups COLD buttermilk
  • ½ cup pumpkin (solid pack puree)
  • 1 egg
  • ½ cup COLD shortening
  • 2 tablespoons COLD butter
  • Optional: cinnamon sugar
Instructions
  1. Heat oven to 450 F. Cover baking sheet with parchment.
  2. In a large bowl, combine flour, brown sugar, baking powder, baking soda, salt, grated ginger, and spices.
  3. In a small bowl, whisk together the buttermilk, pumpkin, and egg. Set aside.
  4. Add cold shortening and butter to dry ingredients and, using a pastry blender, blend until there are no lumps larger than a pea.
  5. Add buttermilk mixture all at once and stir just until most of the flour is incorporated. Do not overmix. It's okay if there are some streaks of flour.
  6. Turn dough out onto generously floured surface. Turn once to coat with flour, then gently pat with your hand until the dough is almost 1-inch thick.
  7. Using a floured biscuit cutter, press straight down and lift straight back up. Lift each biscuit with a thin spatula and move to prepared baking sheet. Gently gather scraps and press together to cut.They won't be as pretty, but will still taste great. (For a sweet biscuit, sprinkle with cinnamon sugar.)
  8. Bake for approximately 13-14 minutes, or until rich golden brown. Cool on rack.

Blend shortening and butter into dry ingredients.

Whisk the buttermilk, pumpkin, and egg together.

Stir just until most of the flour is incorporated. Flour streaks = perfect!

Press a round cutter straight down and lift it straight back up. Don’t twist!

Freshly baked.

Eat ’em plain, coated with cinnamon and sugar, or covered with sausage gravy. Ginger Spice Pumpkin Biscuits make a wonderful breakfast sandwich, too – just add eggs, meat, cheese.

This is where I give you fair warning: Until I work through my list or run out of canned pumpkin, there will be no mercy. It’s pumpkin everything, starting . . . NOW.

Lorinda


Charcuterie Contest – and Garlic Olive Swirl Bread


Here’s the photo I entered in the CuttingBoard.com photo contest.

I have spent the last three days arranging and rearranging a variety of meats, cheeses, and accompaniments on a bamboo cutting board. I stepped out of my happy little baking world to dabble in the art of charcuterie when I was inspired by the Cutting Board and John Boos Photography Contest to try my hand at something other than taking photos of cookies and cakes.

What began as a fun project for a contest may have turned into a new obsession. Trust me, when you look at the cutting boards on Cutting Board’s website you’ll understand my sudden fascination with cold cuts and the many ways of displaying them.

Don’t worry, it’s not all about salami and cheese. I also created a super yummy bread to use in my photo—one that has swirls of garlic, olives, and cheese. The bread dough is made with pumpkin ale, and is chewy on the outside and soft on the inside. Killer!

You’ll find the recipe at the end of this post.

For my first effort, I used a light box and photographed a lovely collection of goodies. It was very attractive and (I think) appealing. But instructions for the contest said that they appreciated “originality and humor”, which my photo didn’t exactly express.

Haha, do you like the way I used camo duct tape to hold up the tablecloth in the background? Claaaaaaassy.

Well, shoot. I’d have to try again.

I pulled out the paper mache bears I made for a fair display this year and put them to work. I’m almost embarrassed to tell you how many photos I had to take to get one I liked. It took me two days and three separate setups and photo sessions. The lighting was off, the light outlet under the window showed, the bear’s ear was wonky, the salami was blurry. I like to use the natural light in my dining room when I can, or my lightbox when I can’t, but these bears had to be looking through the window.

The window with the screen removed, of course. And in case you should try this at home, here’s a tip: if the photographer gets involved with reviewing her photos and forgets to close that window, a whole lot of moths will see it as an invitation to visit. Gah!

This was a real learning experience. I’m used to taking photos of baked goods, and can usually get something I like in one session. But this? Wow. I am going to dig out that Canon Rebel T3 for Dummies book and figure out my camera if it kills me.

Throughout this ordeal, I was sending photos to my daughter, asking her which ones she liked. Begging for suggestions. After hearing me complain about overexposed cheese, blurry salami, and depth issues, she finally asked me if I used my F-stop.

“Um. No?”

It seems there are other options on my little Canon Rebel T3 than Auto Focus. Who knew? Well, actually, I knew. I’d read that Dummies book, and some of it actually made sense at the time, but at my age (don’t ask) retention is sometimes problematic. So I usually use Auto Focus or sometimes play with manual and A-Dep (for when I want everything in focus). This time I played around with the AV option too, to try to get the bear heads a little out of focus so the board of food would stand out.

To be completely honest, I don’t even know which photos were the result of which methods. There were literally hundreds of photos to go through when I was done.

I was through with the second session, thinking I had a couple of good shots when The Man mentioned that I should have put smoked salmon on the board, as a bear attractant. Why didn’t I think of that? We live up in the mountains, and a trip to the store usually just has to wait for my regular weekly jaunt to town, but under the circumstances, I made an exception and raced for smoked salmon and some Prosecco. (I felt that sparkling wine would be a good addition.)

So much for that. I waited until the sun went down so the light coming through the window wasn’t glaring. I set up the lights and camera. Again. Loaded up my cutting board with goodies. Again. Added the salmon and the wine. Took a ton of photos, put away the meat and cheese. Again. And then realized that:

  1. I’d piled too many things on the board. It looked cluttered. Note to self: less is more.
  2. I should have flaked a piece of the fish so it would look like fish. It looked like ham! (Trust me, it cost more than ham!)
  3. By the time I stopped fussing, it was almost dark, which turned everything muddy.

I briefly considered one more try the next morning, but just didn’t have it in me. The photo without the salmon and wine would have to do.

Behind the scenes

We’ll be eating a lot of salami, nibbling on a lot of cheese, and noshing on olives for the next week or so. Or maybe I should open a deli? But it was worth it; I learned a lot, and (with the exception of a few frustrating moments) enjoyed the experience thoroughly.

And hey, in case you were wondering, sparkling wine doesn’t last. Someone had to drink it immediately, right? But I shared it with my friend. 

Here’s that recipe for you. I used pumpkin ale, but any beer will do.

Garlic Olive Swirl Bread
Print
Author:
This soft bread with a chewy crust and delightful swirl of garlic, olives, and cheese will be the talk of your charcuterie board! Makes two small baguette-type loaves.
Ingredients
  • ¼ cup warm water
  • ½ teaspoon sugar
  • 1 package active-dry yeast
  • 1 bottle (12 oz.) beer. I used Pumpkin Ale
  • 1 tablespoon olive oil
  • 3½ - 4 cups bread flour
  • 1 teaspoon salt
  • 1 tablespoon butter, melted
  • 1 cup grated cheese - cheddar is great, or add in some strong cheese too (Asiago, Parmesan, Romano).
  • 1 cup chopped olives (A mixture of green, black, Kalamata)
  • 3 large cloves garlic, minced
Instructions
  1. In a small bowl, combine warm water, sugar, and yeast. Allow yeast to soften 5 minutes, or until bubbly.
  2. In a small pan, gently warm beer on low heat just until lukewarm.
  3. In a large bowl, combine yeast mixture, beer, and olive oil.
  4. Add 3½ cups bread flour and salt. Mix with dough hook for 3 minutes. If the dough is still very sticky, gradually add additional flour until just slightly tacky to the touch. Continue to knead by machine for another 3 minutes. (If kneading by hand, after stirring in the 3½ cups flour, drop dough onto well-floured surface and knead 8 minutes.)
  5. Place dough in greased bowl, turning to coat the dough. Cover and allow to rise until double, approximately 1 hour.
  6. Punch dough down and roll into a 9x18 rectangle. Brush lightly with melted butter. (You won't use it all. Save some for the top of the baked bread, for a softer crust.)
  7. Sprinkle the cheese, olives, and garlic on the dough and roll up from the long side. Pinch the seam and ends to seal. Cut the roll in the middle, creating two long loaves.
  8. Pinch the cut ends closed, and roll each loaf gently to achieve an even size.
  9. Place both loaves on prepared sheet and let rise for about 90 minutes, or until they feel puffy. (They won't double but should come close.) Slash the tops several times with a very sharp knife or razor blade.
  10. Place pan of water on lower rack of the oven. Heat oven to 450 F.
  11. BE VERY CAREFUL WHEN YOU OPEN THE OVEN. THE STEAM IS HOT!
  12. Bake approximately 25 minutes, or until bread is rich golden brown. Brush with butter for a softer crust. Cool on rack.

Soften yeast in warm water until bubbly

Gently heat the beer until lukewarm

Place dough in greased bowl. Turn to coat and let it rise.

Combine chopped olives, garlic, and cheese.

Dough is ready to go!

Roll dough into a rectangle, add filling, and roll it up

Cut roll in half and pinch the ends shut

Place loaves on baking sheet sprinkled with cornmeal

Slash and bake

Yes, I’ll be experimenting with more real food in the future. Possibly more healthy food, though I will never be able to stop baking. Nevah! Maybe I’ll have to change the blog to “The Rowdy Baker Reconsiders”, or maybe “The Reformed Rowdy Baker”. Once the Prosecco wears off I may laugh this idea off. We’ll see.

Lorinda


Hot Cross Mini Buns


About the size of a large doughnut hole, though not as sweet, these miniature hot cross buns will look great in a basket on your Easter table. The dough is filled with raisins or currants, spices, and saffron (if you choose to add it). The taste can be a surprise, because our eyes see the icing design on top and our brain assumes that the buns themselves will be sugary, like cinnamon rolls . . . or doughnuts. They aren’t. The bread is like a slightly sweet dinner roll, though those little bits of fruit inside do add a sweet surprise with each bite.

With regular hot cross buns there’s a higher bread-to-icing ratio, so I usually slather mine with butter or jam, but these little ones don’t need to be gussied up like that. Just two bites (unless you’re my husband, in which case, they are popped into his mouth whole) and you’re reaching for the next one. See? You’ve just saved all of those pesky butter and jam calories, so you can eat more mini buns!

A few years ago I made hot cross buns for a Yummy Northwest Easter column, using a very old and challenging recipe. It was an experience. If you’d like to see what happens when I have kitchen fail after kitchen fail, by all means go read the archived article: Old Fashioned Easter. Scroll down; the link to the recipe is right under the photo of Hot Cross Buns.

HINTS:

  • I added saffron to this recipe because it’s a traditional spice used to symbolize something or other (sunshine, spring, happy stuff) and because I happened to have a bottle of it languishing in the pantry. If you have some, add a few strands – but don’t overdo it, because the sweet spices like cinnamon and nutmeg should predominate.
  • You don’t have to mark the tops of the raised buns. You can just bake them as they are and use the icing alone to create the crosses. If you want to cut the design in the top before baking, make sure you use a very sharp blade so the puffy little buns don’t get smooshed.
  • If you like lots of fruit in your rolls, add more raisins or throw in a handful of chopped apricots or dried cherries.


Hot Cross Mini Buns
Print
Author:
Makes 60 mini buns Hot cross buns are slightly sweet and lightly spiced. Saffron is a traditional addition, but the buns are delicious without it, too.
Ingredients
  • ⅔ cup milk
  • small pinch saffron - OPTIONAL!
  • ½ cup raisins
  • ½ cup butter, cut into large chunks
  • ¼ cup plus 1 teaspoon sugar, divided
  • 1 cup very warm water
  • 1 package active-dry yeast
  • 1 egg
  • ½ teaspoon cinnamon
  • ⅛ teaspoon ginger
  • ⅛ teaspoon nutmeg
  • ⅛ teaspoon ground cloves
  • ⅛ teaspoon allspice
  • 4½ cups bread flour
  • ¾ teaspoon salt
  • GLAZE:
  • 1½ cups powdered sugar
  • ½ teaspoon vanilla
  • pinch of salt
  • 3 tablespoons water (or use fresh lemon juice for some "zing")
Instructions
  1. In small saucepan, heat milk and saffron (if using it) until bubbles form around the edge of the pan. Remove from heat and, using a strainer if you added saffron, pour into a large bowl. A stand mixer is best. Add raisins, butter, and ¼ cup sugar, stirring briefly. Butter will soften, but don't worry if it isn't completely melted.
  2. In a small bowl, combine warm water with remaining 1 teaspoon sugar. Add yeast and allow mixture to sit until foamy - about 5 minutes.
  3. Add yeast mixture, egg, and spices to the milk mixture and beat until combined.
  4. Add flour and salt. Switch to dough hook if using a stand mixer, and knead by machine for 5 minutes. If kneading by hand, drop dough onto lightly floured surface and knead 7-8 minutes. Dough should be soft but not sticky.
  5. Place dough in greased bowl, cover, and let rise until double, about 1 hour.
  6. On lightly floured surface, punch down dough. Divide into 60 equal pieces and roll into balls. The easiest way to do this is to work on an unfloured surface. Form a ball by bringing the sides to the top, like an Asian dumpling, and then turning the ball over and pulling it towards you, scooching it along the surface.
  7. Place balls at least ½-inch apart on ungreased baking sheets, cover, and allow to rise until almost double, about 1 hour.
  8. Heat oven to 375 F
  9. Combine powdered sugar, vanilla, pinch of salt, and water (or lemon juice) in a small bowl. Mix well. (Hint: for a firmer icing, add ½ teaspoon meringue powder.) Remove 2 tablespoons of icing and place in a small cup. Add water to the small cup a few drops at a time until it is a very thin consistency. This will be brushed over hot rolls to add a thin, shiny coating. Place remaining icing in a heavy plastic bag with one tip cut off, or in a pastry bag with small writing tip.
  10. With a very sharp knife or razor blade, cut a cross shape on top of each bun, if desired. Bake mini buns for 12-14 minutes, or until the tops are rich golden brown. Remove from oven and immediately brush with a light layer of the thinned glaze. Allow to cool on a rack.
  11. Pipe a cross on each bun with icing (fill in the design if you cut the buns before baking) and allow to dry thoroughly before storing.

Add a small pinch of saffron to milk if desired. (I may have gone a little crazy here. Don’t use quite that much unless you love the taste of saffron!)

Heat milk until bubbles appear all around the edge of the pan. (Don’t forget to strain out the saffron.)

Isn’t this beautiful, soft dough?

Cut dough into 60 equal pieces. (Mrs. OCD here can tell you that I had 60 20-gram balls of dough. Yes, I weighed them. No, you don’t have to.)

Roll into balls and place on ungreased cookie sheet to rise.

After balls rise, cut an X in them with a very sharp knife or razor blade if desired. (Or you can skip this step and just make the X with the icing after they’re baked.)

Brush with thin glaze while hot, and then pipe on the cross after they cool.

They don’t have to be for Easter, of course. Skip the icing and split these little sweethearts in half. Spread with lemon curd, honey butter, or flavored cream cheese for a luncheon or party. And . . . hide a few for yourself!

Lorinda

Guinness Bread Braids – Sweet or Savory

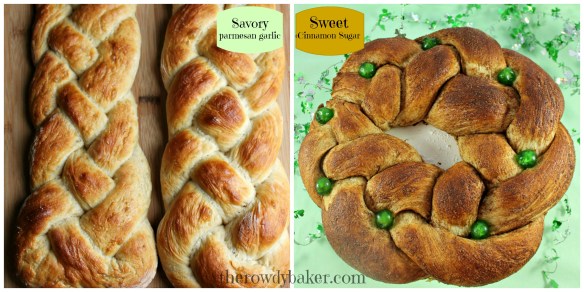
I went all Irish on you with this bread. It has both Guinness Stout beer AND potato in the dough. You won’t even taste the beer, but what a pillowy-soft dough it helped create. I made a savory Celtic braid by adding some Parmesan and garlic to the dough, and turned another batch into a braided cinnamon and sugar ring.

Both were light – surprisingly light – and tender. I will say, however, that this is a bread that is best eaten the day it’s made. On day two it was just a tiny bit chewy, though if it had been heated a little, I probably wouldn’t have noticed. This almost made me wish I hadn’t deep-sixed the microwave. (A pat of butter and a few seconds in a microwave will revive any cinnamon roll . . . or braid.)


Guinness Bread Braids - Sweet and Savory
Print
Author:
Makes two Celtic braids or one braided cinnamon ring.
Ingredients
  • 1¼ cups very warm water
  • 3½ teaspoons sugar, divided
  • 1 package active dry yeast
  • ½ cup Guinness Extra Stout beer
  • 1 tablespoon butter
  • ½ cup dry instant potatoes
  • 1 teaspoon salt (3/4 teaspoon if your instant potatoes contain salt)
  • 3½ cups all-purpose flour
  • VARIATIONS:
  • For Celtic Braid: ½ cup freshly grated Parmesan cheese and ¼ teaspoon garlic powder, if desired. 1 egg and 1 tablespoon water combined for egg wash.
  • For Cinnamon Ring: 2 tablespoons butter, 1 tablespoon cinnamon, ⅓ cup sugar, green candied cherries. Icing if desired.
Instructions
  1. In a large bowl, combine warm water and ½ teaspoon sugar. Add yeast and allow mixture to sit for at least 5 minutes, or until foamy.
  2. In a small saucepan on low heat, heat the beer and 1 tablespoon butter until beer is lukewarm. (It’s okay if the butter hasn’t melted completely.)
  3. To the yeast mixture, add warm beer mixture, instant potatoes, salt, flour, and 3 teaspoons sugar. (IF MAKING SAVORY BREAD, ADD PARMESAN AND GARLIC.) Mix well. If using a heavy stand mixer, let the mixer knead the dough for 5 minutes. (If kneading by hand, knead on generously floured surface for 7-8 minutes.) Dough will be very soft, slightly sticky, and may stick to the sides of the bowl a little. Cover the bowl with a towel and allow to rise until doubled, about 1 hour.
  4. FOR CELTIC BRAID: Cover large baking sheet with parchment. Punch down dough and divide dough into 4 pieces. (If dough is too sticky to work with, knead it a few times on a generously floured surface.) Working with 2 pieces at a time, roll each piece into a rope about 2 feet long. Follow photo instructions in post for making braid (or find a template online). Repeat with remaining 2 pieces. Place braids on prepared baking sheet and brush with egg wash. Cover loosely with towel, and allow to rise until doubled - about 1 hour.
  5. Heat oven to 375 F. Bake for about 25 minutes, or until rich golden brown. Cool on rack.
  6. FOR CINNAMON RING: Prepare two large baking sheets by covering with parchment. (One will be used to coat the bread ropes in butter and cinnamon, and the other will be used to bake the braid.)
  7. Punch down dough and divide into 3 equal pieces. Roll into ropes, each approximately 24 inches long.
  8. Melt butter and pour onto one of the prepared baking sheets. Combine cinnamon and ⅓ cup sugar in a small bowl.
  9. Roll ropes of dough in the melted butter and sprinkle with the cinnamon sugar mixture, rolling until completely coated.
  10. Pinch the three ropes together at the top. Lift onto clean baking sheet and braid. Tuck the ends under and pinch together where the ends meet.
  11. Cover braid loosely with clean towel and allow it to rise until almost doubled, about 1 hour. Decorate with green candied cherries, if desired.
  12. Heat oven to 375 F. and bake for 30 minutes, or until golden brown. Place baking sheet on cooling rack for 5 minutes, then slide braid and parchment onto rack to cool completely.
  13. Drizzle with icing if desired. To make a simple icing, combine ½ cup powdered sugar, 1-2 drops green food coloring, and 1 tablespoon milk or water.

Dough will be sticky. Don’t add extra flour yet – you can always work in a little more once it’s risen if necessary.

Rises like a champ! Wait ’til you feel this dough – it’s billowy and soft as a baby’s cheek.

Roll dough around in the flour. If it’s really sticky, knead it a few times to add a bit more flour and make it manageable.

Start by crossing the two ropes at the middle, like an “X”.

And then do this . . .

. . . then this.

It should finally look something like this.

Brush the braid with egg wash and bake!

If you’re making the cinnamon ring, it’s a little easier – just a simple braid:

For the cinnamon braid, begin with three long dough ropes.

Roll them in melted butter, then coat them with cinnamon and sugar.

Braid the sticky ropes on a clean piece of parchment. Tuck the ends under and pinch together to make a ring.

Risen and ready for the oven.

Warm and fragrant.

Oh, and if you want to go with the whole green thing, drizzle this puppy with some green icing. 

Serving it was kind of interesting. You can cut it in slices (the least messy option) or you can do what we did and just rip and tear. Licking your fingers is half the fun – no fork and knife for this gal.

Happy St. Patrick’s Day!

Lorinda

Guinness Cloverleaf Rolls

They may not be green, but these dinner rolls are exactly what you need for your St. Patrick’s Day meal. Made with Guinness, Irish butter, and oats, their flavor is rich and hearty, and they have a fantastic texture. Soft but substantial – which is what they’ll be calling me if I keep testing my creations!

And believe it or not, the rolls are super easy to make. (See the recipe below? See how short it is? I think this is a personal record.) I made three batches of dough in less than forty minutes, but I admit that flour was flying. My mixer is a real workhorse, thank goodness. For the sake of full disclosure, I also have to mention that each batch uses one cup of beer, so there’s a little left in the bottle. By making 3 batches back to back, I got to have a full bottle of Guinness as I worked. Sweeeeet.

Dividing the dough into 36 equal parts and rolling them into balls is the only thing that will take a little time, but there’s nothing hard about it. I wanted mine to be similar in size, so I weighed the dough, did the math, and (in case you’re wondering) each ball was approximately 1 1/2 ounces, or 45 grams. Just sayin’. You don’t have to do this unless you plan to take photos and put them on a blog!

I used Irish butter because I love it and it seemed appropriate. It’s a little pricey for baking, but hey – St. Patrick’s Day only comes once a year. Splurge a little; it really does have wonderful flavor.

You’ll smell the beer as the rolls are baking. I’ve got to say, it made me a wee bit nervous; it smelled like a distillery in my kitchen. But the rolls didn’t taste like beer at all to me. If anything, the Guinness gives them sort of a whole wheat taste, and I’m good with that. Yum.

The only warning I’m going to give you is this: keep an eye on the bread as it’s rising! Mine only took about 45 minutes for the first rise and once the rolls were formed, it took less than an hour for them to be ready for the oven. They are very enthusiastic.

Guinness Cloverleaf Rolls
Print
Author:
Makes 12 jumbo or 24 standard rolls.
Ingredients
  • ½ cup very warm water
  • ½ teaspoon sugar
  • 2 packages active-dry yeast
  • ½ cup milk
  • ½ cup water
  • 2 tablespoons butter
  • ¼ cup molasses
  • 1 cup Guinness Extra Stout Beer
  • 5½ -6 cups white bread flour
  • 1 cup quick oats
  • 1 tablespoon salt
Instructions
  1. In a small bowl, combine ½ cup very warm water and sugar. Add yeast and set aside to proof.
  2. In a small saucepan, bring milk and water to a simmer. Remove from heat.
  3. Add butter, molasses, and beer. When butter is melted, place mixture in large bowl of stand mixer fitted with dough hook.
  4. Add the yeast mixture and 5½ cups flour, the quick oats, and salt. Mix on low for 3 minutes. If the dough isn’t coming cleanly away from the side of the bowl, or if the dough feels very sticky, add the remaining ½ cup flour. Knead for 3 minutes. (If kneading by hand, place on floured surface and knead for 5 minutes.)
  5. Place in a large greased bowl, turn to coat the dough, cover with a towel or plastic wrap, and allow the dough to rise until doubled – about 1 hour. It may be less, depending on the temperature of the room.
  6. Grease jumbo muffin pans and then divide the dough into 36 equal pieces. (For small rolls, grease standard muffin pans and divide dough into 72 equal pieces.)
  7. Allow rolls to rise until almost doubled, about 1 hour.
  8. Heat oven to 400 F.
  9. Bake 15-18 minutes, or until tops are rich golden brown.
  10. Remove from oven and brush tops with butter. Turn out of the pan and serve warm, or allow rolls to cool completely on rack.

Stir butter and molasses into the hot milk mixture and then add beer.

Add the foamy yeast to the warm liquids, then add dry ingredients.

This is where you knead the dough, of course. I use my stand mixer and a dough hook.

Put dough into greased bowl. Turn it over to lightly coat.

This dough rises quickly!

Put 3 balls of dough in each cavity of muffin pan

Let 'em rise.

Let ’em rise. Bake!

Brush hot rolls with butter

. . . and enjoy!

Oh, and you might want to keep this recipe around, because it will make two wonderful loaves of bread if you’d rather not fuss with rolls. It slices perfectly, doesn’t crumble, and makes great sandwiches and toast.Three bottles of beer left. Hmm. More bread? I don’t think so. Sláinte!
Lorinda

Pumpkin Sourdough Bread

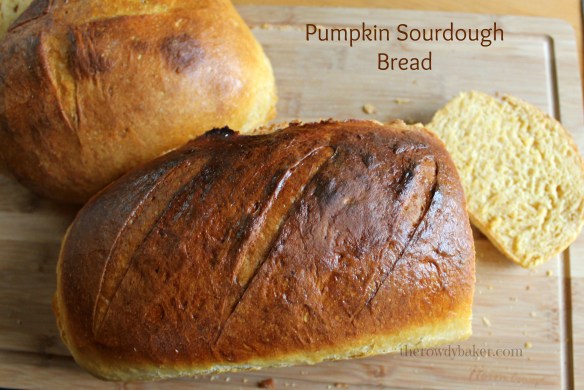
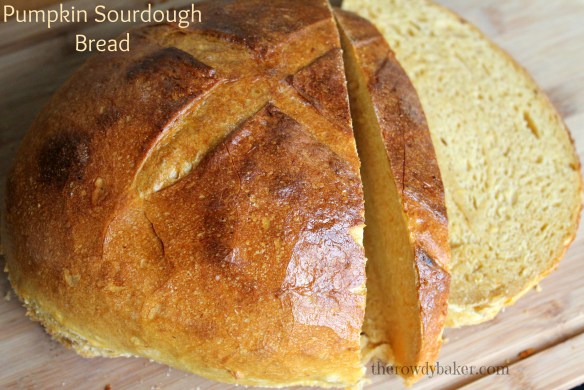
pumpkin-sourdough-bread-the-rowdy-bakerTangy sourdough combines with rich pumpkin puree to flavor this bread to perfection. The fragrant loaves are a reminder that there’s a chill in the air and comfort food is beckoning…a harbinger of the coming holidays.

A turkey and cranberry sauce sandwich on sourdough pumpkin bread? French toast with pure maple syrup? Crackly, chewy rolls with soft interiors? Yes, PLEASE!

Sourdough starter is always hanging out in my refrigerator…unless I’ve killed it. Sourdough and houseplants are at risk in my household. I either smother them with attention or forget about them until it’s too late to rectify the situation.

Which is why I keep dried sourdough in my freezer; it’s a backup plan that has come in very handy.

If you don’t have sourdough starter, there are several options:

    • Start your own. I had a tough time with this in the past, but the method I used this time was easier than I expected. Maybe I just got lucky and caught the right yeast, but it was pretty painless.
    • Beg some off of a friend. I’ve done this too, but if I kill the starter I feel really guilty (sorry, Laurie!) so I tend to muddle through by myself.
    • Send away for some that is a strain from the 1800s…absolutely free. You just need to send a self-addressed stamped envelope (and I encourage a small donation). I love the idea of having starter with a pedigree! Go here for more information: Carl’s Friends.

At least once a week I remove some of my starter (replacing it with flour and water, of course) and mix up a “sponge” – a batter that sits all night and is ready for action the next morning. I use 1/4 teaspoon of instant yeast in the sponge, but if you’re a purist you can skip the yeast entirely. Just be aware that you will be at the whim of your dough; it will rise when it damn well pleases! I get a little insurance by using that tiny bit of added yeast.

Since you won’t know exactly how long your bread will take to rise, I strongly recommend starting your sponge the night before and mixing your dough the next day.

Sourdough sponge - it's ALIVE!

Sourdough sponge – it’s ALIVE!

It’s usually just a matter of adding some water, salt, and flour to get a lovely, crusty loaf of dough – but for this recipe I also added 15-ounces of canned pumpkin puree. (Be careful, don’t use the kind that’s premixed for pies. Grab the solid-pack pumpkin.) I also added a little less water and a little more flour to offset the moisture in the pumpkin.

Note: For a milder flavor, decrease the pumpkin to 1 cup and increase the warm water to 1 cup in the bread recipe.

Pumpkin Sourdough Bread
Print
Author:
Makes two loaves
Ingredients
  • SPONGE:
  • 1 cup sourdough starter
  • 2½ cups unbleached flour
  • 1½ cups water, room temperature
  • ¼ teaspoon instant yeast (optional)
  • ****
  • BREAD
  • The bubbly sponge
  • 15 ounces canned pumpkin
  • ¾ cup warm water
  • 1½ tablespoons salt
  • 6 - 6½ cups bread flour
Instructions
  1. Night before: Create the sponge by combining all of the sponge ingredients and beating well with a wooden spoon. Cover and allow the sponge to sit at room temperature overnight.
  2. Bread: in a large bowl (a stand mixer and dough hook is recommended) combine the bubbly sponge, pumpkin, water, salt, and 6 cups of bread flour. Knead by machine for 5 minutes, or by hand on floured surface for 7-8 minutes. Dough should come cleanly away from the sides of the bowl and be just slightly tacky. If dough is too soft, add additional flour a little at a time.
  3. Cover bowl and allow dough to rise until doubled. If you used a little yeast in the sponge, this will take between 1 - 2 hours. If you skipped the yeast, it could take much longer. Be patient and let the bread do its thing. The longer it takes to rise, the more flavorful the bread will be.
  4. When dough has doubled, punch it down on a lightly floured surface and shape it into loaves. Place in lightly greased loaf pans or form into balls and place on baking sheets with a little cornmeal sprinkled on them. Cover with a towel and allow dough to rise until doubled. With a sharp knife or razor, cut several shallow diagonal slashes in the loaves (or an "X" on round loaves).
  5. Heat oven to 425 F. For the crispiest crust, place a pan of water on the bottom of the rack while the oven is heating. Be very careful when you open the door - there will be lots of steam. Alternatively, you can use a spray bottle to spray the loaves and the inside of the oven when you put the pans in to bake.
  6. Bake for approximately 25 minutes, or until loaves are rich golden brown. For a shiny crust, brush hot loaves with butter. Cool on racks.


Ready to punch down and shape into loaves

Ready to punch down and shape into loaves

Make those loaves whatever shape you want!

Make those loaves whatever shape you want! Let ’em rise, and bake. For crispy, crackly crusts, use steam!

pumpkin-sourdough-bread-from-the-rowdy-baker

I’m a sourdough fiend. Can’t resist a piece (or two) of toasted sourdough with a little peanut butter.toast-with-pb

Once you have an active starter, making sourdough bread is a cinch! My goal is to make as little mess as possible, so I mix my sponge right in the mixer bowl, then just dump the remaining ingredients in the next day. I don’t turn it out into a greased bowl to rise – just cover the mixing bowl. It seriously takes 15 minutes of effort to make a couple of loaves. You just have to time it for when you’ll be hanging around the house.

My guess is, with the scent of sourdough wafting through the air, everyone will be hanging around the house. Get the butter ready!

Lorinda