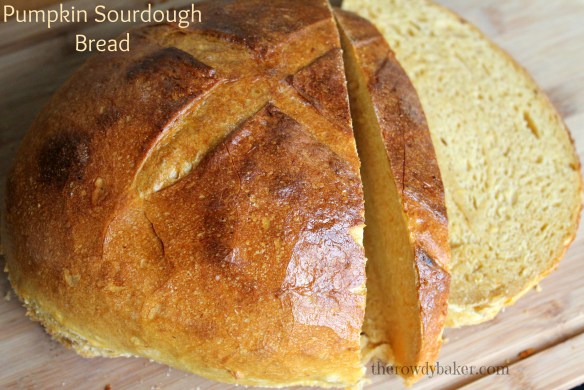
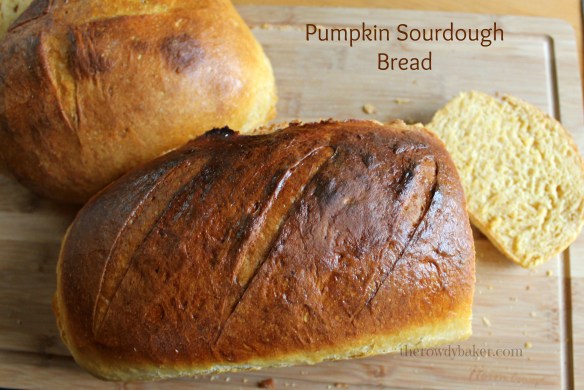
 I’m on a bit of a sourdough kick right now, and couldn’t resist creating a sourdough version of my Pumpkin Rye Bread. This is a little denser, chewier . . . just the way I like it. It also takes longer that the yeast version (though it is not a bit harder to make), so I recommend you start this bread in the evening and let the dough rise overnight in a cool spot.
I use a cast iron Dutch oven with a domed lid for baking sourdough bread. The pan helps the bread keep its shape and the lid holds the steam in and gives the loaf a wonderful crust. If you don’t have one, you can simply put a pan of water in the bottom rack of your oven when you start preheating. The bread can go on a baking sheet on the rack above the water and the steam will give your bread that magical sourdough crust.
This loaf has been dropped into a preheated (OH so hot) Dutch oven. Lid goes on for baking. (You’ll notice for this loaf I put the orange strip down first with the dark dough on top of it, then rolled, for a lighter colored loaf.)
This is ideal for Thanksgiving or Christmas, but you know I can’t just leave a recipe alone, right? So . . . with Halloween as an inspiration, I made a batch with food coloring for more contrast, and cut designs on an outer layer of rye dough. I love the way it turned out!


With the exception of food coloring, the ingredients are the same; it’s just formed differently. The loaf at the top of the post was rolled up like a cinnamon roll, and the Halloween version was made of a ball of brown dough wrapped in orange dough, wrapped in the remaining brown dough.
Get creative. As long as you handle the dough gently to keep as many of those precious air bubbles in it as possible, you can play to your heart’s content. I think a whole lot of balls of dough pressed together and then formed into a smooth ball or covered with a layer of dough would be fun. Next time!
| Sourdough Pumpkin Rye Bread | Print |
- ½ cup (about 5 oz) sourdough starter
- 1½ cups filtered water
- ½ cup solid pack pumpkin
- 4 cups bread flour (divided)
- 1½ teaspoon salt (kosher or sea salt is best)
- 1 cup rye flour
- 1 tablespoon caraway seeds
- 1 tablespoon molasses
- 1 teaspoon unsweetened cocoa powder (2 if you're going for darker dough)
- 1 teaspoon espresso powder
- Food coloring (optional) for richer colors
- Begin this bread in the evening and bake the next day. The first rise takes 8-10 hours.
- In a large bowl, combine sourdough starter, pumpkin, and water. (Add orange food coloring here, if desired.) Stir in 3 cups of bread flour, and salt until completely blended.
- Pile 1 cup of bread flour on work surface and drop half of the dough onto it. Using a bench scraper to help if necessary, knead until dough is smooth and doesn't stick to hands - about 5 or 6 minutes. You will use up most of the flour. Form dough into a ball and place in greased bowl.
- To make the rye dough, you can either knead by hand or machine. If kneading by hand, add caraway seeds, molasses, cocoa powder, and espresso powder. Mix well, then place 1 cup of rye flour on work surface, drop the dough onto it, and proceed as you did with the orange dough. You may need a little additional flour; if so, don't use more rye flour - use bread flour. If kneading by machine, use a dough hook. Add rye flour and the remaining ingredients and knead for 5 minutes. Add a little more bread flour if dough is overly sticky. Form into ball and place next to the orange dough in the bowl.
- Cover with plastic wrap and let the dough sit in a cool place overnight.
- The next day, carefully separate the two balls of dough (don't worry if a little of one color sticks to the other.) Handle the dough as gently as possible so you don't lose all the bubbles. Press, stretch, or gently roll each piece into a long wide strips, about 3 inches wide by 14 inches.
- Place one on top of the other. If the dark strip is on the bottom, more dark will show on the outside of the loaf, and vice versa. Roll the two pieces up together and pinch the end to seal.
- Turn so the swirl is on top and use the sides of your hands to tuck the dough under a little, scooching the bread along the work surface to smooth the bottom.
- Place in a bowl lined with floured plastic wrap or a floured dishcloth. Cover and let rise until doubled. Depending on your sourdough starter, this could take anywhere from 1 - 4 hours.
- Baking in a Dutch oven: Set the bottom half of Dutch oven on second lowest rack in oven and preheat to 450 for at least 30 minutes. (No grease is necessary if it is well seasoned.) Open oven and pull out rack. Gently lift dough from bowl and CAREFULLY drop it into the VERY hot pan. Use a scissors or sharp knife to make three quick cuts across the bread, cover with the lid, and return it to the oven. Reduce heat to 425 and bake for 20 minutes. Remove lid and bake for an additional 20 minutes, or until the bread is beginning to brown.
- BAKING on BAKING SHEET: Put a large pan of water on bottom rack of oven and preheat to 450 F. for 30 minutes. Dust the center of a baking sheet with flour or corn meal. Lift dough from bowl and place on baking sheet. Open oven door carefully (the steam is very hot) and quickly put the bread on a rack above the water. Reduce heat to 425 F and bake about 40 minutes, or until bread is beginning to brown.
- Remove from oven and tip out onto cooling rack. The bottom of the bread should be brown and sound hollow when tapped. Allow bread to cool before cutting.
NOTE: Photos are for the original recipe. Halloween bread photos and instructions will be at the bottom of the post

Combine sourdough starter, pumpkin, and water.

Stir in 3 cups bread flour and the salt. It will be kind of . . . gloppy. That’s okay!

On work surface, drop half of the dough onto 1 cup bread flour and (using a dough scraper to begin with, if necessary) knead until smooth (about 5 – 6 minutes).

It should hold its shape and shouldn’t stick to your hands or the work surface. It will use most of the flour to reach this point.

To remaining dough, add molasses, caraway seeds, cocoa, and espresso powder. Mix well.
This is where there should be a photo of me, kneading the rye dough on a bed of rye flour. The photographer (ahem) was negligent. Sigh. Just figure it’s the same as incorporating the flour in the orange dough, only you MAY need a little more flour (because of the molasses). If so, use bread flour, not more rye.

Snuggle them up, cover with a cloth or plastic wrap, and let them rise in a cool place overnight.

Next day, pat each ball of dough into a long strip, about 3 inches wide, and 14 inches long. (Longer makes smaller marbling, shorter makes big, bold streaks.)

Lay one piece on the other (whichever color you want to show most on the outside should be on the bottom) and roll it up. Pinch the end to seal. Turn so the swirl is on the top and use the sides of your hands to tuck the bottom underneath a little, while “scooching” the bread toward you and turning.

Line a bowl with plastic wrap or a dish towel, and sprinkle generously with flour. Place dough in the center. Cover, and let rise until doubled. Depending on your starter this could take anywhere between 1 – 4 hours. Mine took 2.

This loaf has been dropped into a preheated (OH so hot) Dutch oven. Lid goes on for baking.

HALLOWEEN VERSION!
Use the same ingredients but add a generous squirt of orange coloring when you add the pumpkin and water, and then add black food coloring to the remaining dough when you add the molasses. Follow the recipe instructions for adding the remaining flour and tuck them into the bowl to rise.

Waiting to be put to bed for the night.
The next day, instead of forming two strips and rolling them together, divide the dark dough into two pieces. Roll one into a ball, place on slightly flattened orange dough and bring the orange dough up to completely cover the dark dough. Pinch together well and flip it over, smooth side up.

Pull orange dough up and over the ball made with half of the dark dough.
Flatten, gently stretch, or carefully roll out the remaining dark dough, large enough to completely encase the orange ball. Lay it over the orange dough ball and tuck under the bottom. Gently “scootch” the ball toward you, spin a little to the right, pull toward you again. Repeat until the dough is smooth.

Drape the remaining dark dough over the ball. (That’s my hand under there. I may have gotten carried away and made it a little too big. The stuff stretches! The extra dough just got tucked under, creating a thicker dark marbling at the bottom. You can’t go wrong with this!
Line a bowl with a dishtowel or plastic wrap, dusted in flour, and set the dough in the bowl. Cover and let rise until doubled. This can take anywhere from 1-4 hours, depending on the enthusiasm of your sourdough starter.

Ready to rise
Lift out and, using scissors, knife, or razor, cut designs in the dough, snipping deeply enough to see the orange, and even the brown center. Bake as instructed in the recipe.

Snip snip!

Okay, WHEW. I think I’m ready to move on from bread now.
I make these recipes seem WAY more complicated than they are, because I don’t want to leave any questions in your mind when you’re elbow-deep in flour. If I had a little more technological ability I’d just do a video. (Maybe in the future, but don’t hold your breath.)
As Julia Child said: “Learn how to cook- try new recipes, learn from your mistakes, be fearless, and above all have fun!”
Lorinda

 Tangy sourdough combines with rich pumpkin puree to flavor this bread to perfection. The fragrant loaves are a reminder that there’s a chill in the air and comfort food is beckoning…a harbinger of the coming holidays.


